jeff joseph -- woodworker
handcrafted furniture from sustainably managed woodlands
plugs
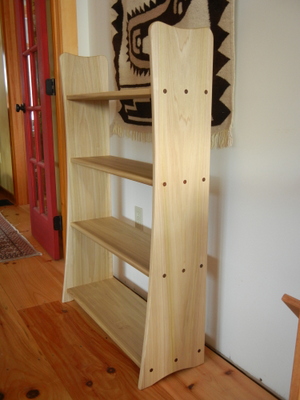
As much as I like building pieces of furniture that rely solely on tight-fitting joints (and small amounts of wood glue) for their strength and durability, there are situations where using some form of mechanical fastener just makes sense. This small bookcase that I recently put together is an example of such a situation.
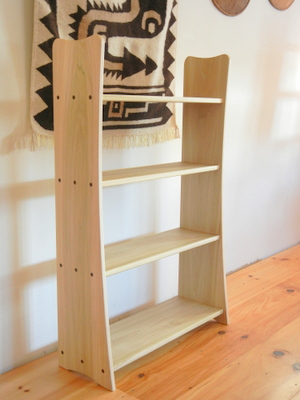
I had a few wide (12″+) Tulip boards left over from a previous project, and was looking to clear some space on my lumber rack in my shop. The boards were 4/4, and in the rough, meaning (for those who don’t know) that they were about an inch thick, and had yet to be surfaced flat and smooth. Unfortunately, the boards were significantly twisted, which necessitated removing a substantial amount of wood in the process of flattening them, so that by the time I was done face-jointing and planing, the pieces chosen for the case sides were down to 11/16″ in thickness.
Normally when I build a case like this, I choose to rout dadoes in the case sides, and cut short ‘tenons’ at either end of the shelves which fit into the dadoes, which, along with some glue, creates a pretty strong joint, despite the fact that end-grain is being glued to face-grain (optimally, a glue joint maximizes the long-grain to long-grain connection of the mating boards, as glue on end-grain has minimal structural strength). Unfortunately, with the reduced thickness of the case sides, I was not able to rout the dadoes deep enough to provide much glue surface in the joint, which would be especially important in a case such as this that has no back to hold it square and provide resistance to racking.
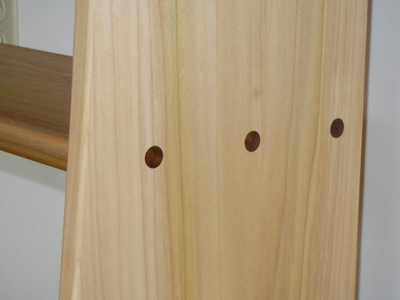
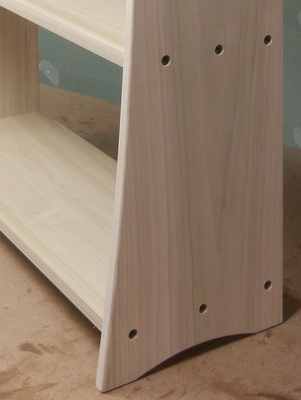
The solution I came up with was to rout dadoes as I normally do, but shallower (1/8″ deep), and to enhance the strength of the joints with screws. This, of course, would require drilling through the outer faces of the case sides, which became a design feature of the piece….once I added some Walnut plugs.
Cutting plugs like this is quite simple, providing you have one of these—
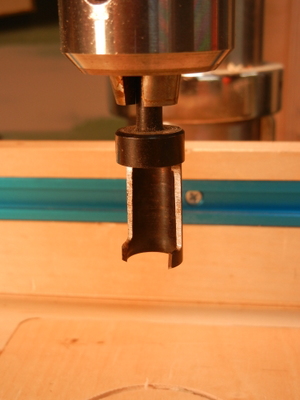
—a tapered plug cutter (note the subtle taper of the cutting edges), which will cut very clean and uniform plugs to fit snugly in a given diameter hole. The cutter shown is for 1/2″ plugs, but they are commonly available in 1/4″ and 3/8″ as well. This is an operation best performed with a drill press, but could probably be done just as well with a portable drill guide and hand-held electric drill. Starting with a squared piece of wood of uniform thickness (and of a species with desirable color and density for the plugs), cut a series of closely spaced ‘holes’ along the edge, to the depth required…
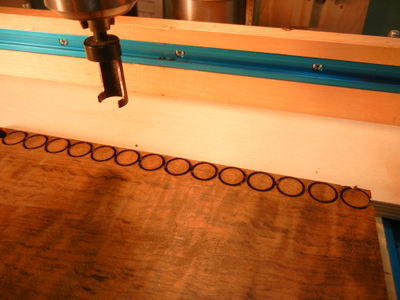
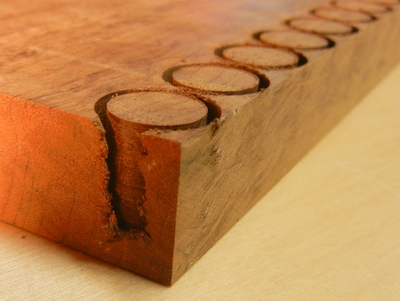
…I usually use 3/4″ thick stock for the plugs, and drill about 9/16″ deep or so. Definitely don’t drill all the way through, as this will cause each plug to stick in the cutter, which will slow things down significantly. Use a stop to maintain consistent depth; this will be important for the next step, which is to cut the plugs out of the board, as they are still attached on their bottom edge.
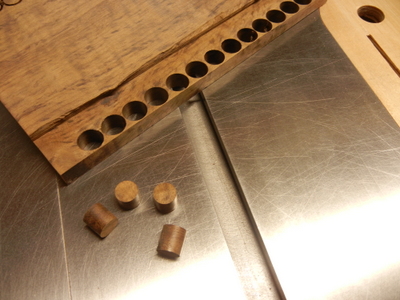
I usually use a bandsaw to cut the plugs out, but it could also be done with a handsaw, or, carefully, with a tablesaw. Whatever method you choose, it is pretty much self-explanatory, with one caveat: If using a tablesaw it is VERY IMPORTANT to tape over the heads of the plugs prior to running the board through (I use painters tape, which I burnish down to the face over the plugs), as otherwise the plugs may want to come exploding out of the board like popcorn in a popper (this definitely falls into the “don’t ask me how I know this” category….). You should end up with something like this:
So that’s the male part of the equation. For the case sides, it is important that you drill your holes as cleanly and of consistent depth as possible. I would highly recommend a forstner bit for this (and preferably a drill press). With narrow case sides, it becomes especially important not to drill these holes too deep, which would greatly weaken or ruin the connection, but still deep enough for the screw head plus the plug over top. Test cuts on scrap are a good idea, as is careful layout to ensure that your screws penetrate the center of the shelf thickness. It is also a very good idea to dryfit the case after drilling the plug holes, ensuring the case is clamped square, then pre-drilling for the screws with an appropriately sized bit, or even better, a tapered bit of appropriate size . I used #9 x 2″ screws.
After assembling the case and driving the screws, add a touch of glue around the circumference of each hole, and with a few taps with a hammer, you’re plugged.
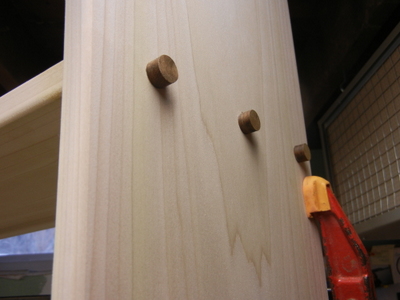
Once the glue sets up, I cut the plugs off as close as possible to the case sides with a small handsaw (the spine on a Japanese dozuki provides a guide for a consistent cut, and the fine teeth cut cleanly without tearing out the grain of the plug), then plane and/or sand them flush.
Another way to use this technique is to drill plugs out of the same wood species as the case itself, and to align the grain, which makes for plugs that are minimally visible, but in this case (no pun intended), I thought the choice to accentuate the contrast worked well.


Beautiful case, and thanks for the construction tips. Very helpful.